|
Members progress on RCCD's
STICK 2 IT
Pictures from J & G Manufacturing. (Joe & George)

|
|
Hey all,
A progress report on the "Stick 2 It" prototype project plane.
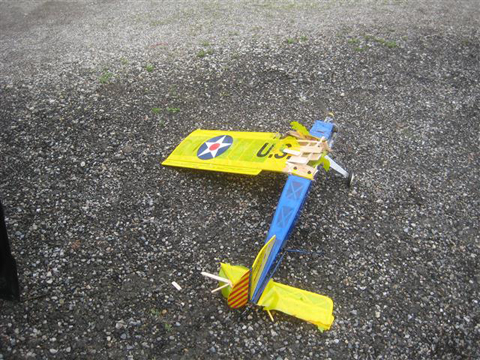
The prototype "Stick 2 It" and another plane tried to occupy the same airspace at exactly the same time Friday afternoon (5-8-15) at the East end of the flying field. This for some reason just doesn't seem to work. So, both airplanes had to immediately return to earth but in somewhat different ways. One made it back to the field even though it sustained major damage. The "Stick 2 it" wasn't so lucky. Missing half of its main wing and a major portion of its tail feathers, it managed to spiral down into the thickly wooded and marshy area East of the flying field.
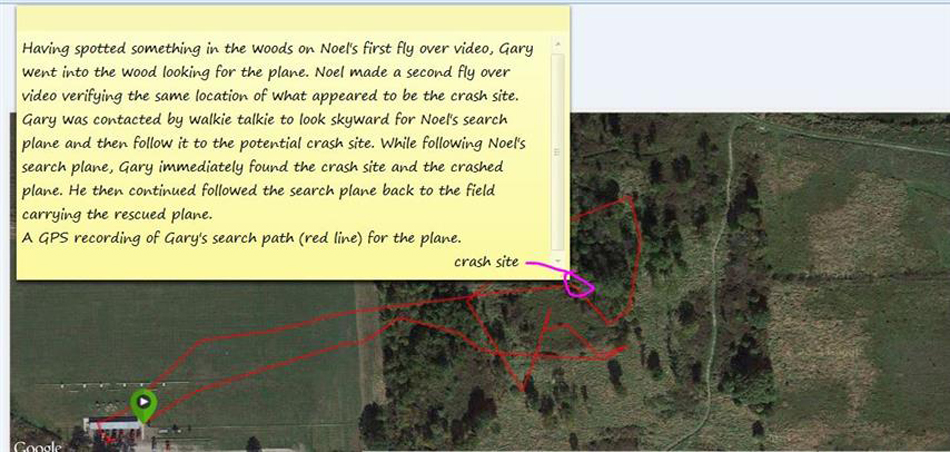
A two man search party Karl G and myself, immediately scoured that area with no luck. Later that Friday evening Noel was contacted and asked if he would do a fly over to help find the missing "Stick 2 It". The weather was changing and had taken a turn for the worse. The winds were in excess of Noel's search plane's limitation. Noel agreed to come out to the field Saturday to conduct an air search for the missing "Stick 2 It". A second two man search party, my son Gary and myself, returned to the field Friday evening, only to be turned back due to the rain and the thunder storms brewing.
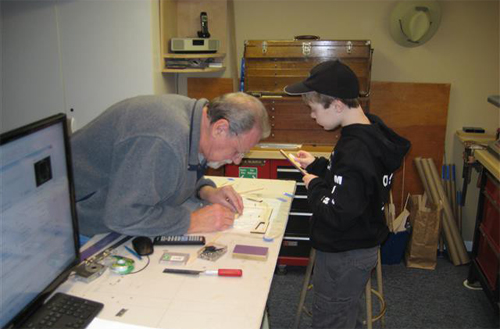
Noel was at the field early Saturday morning, flying his search plane in a methodical pattern trying to video tape the East area beyond the flying field. My son Gary and I brought out and set up our computer and large monitor. By this time, Noel had landed and we copied his video onto our computer. We all reviewed the first video and thought we saw something of interest possibly the crash site. Gary went into the woods trying to find that something of interest, while Noel returned to the sky to again methodically scan the ground East of the flying field, while Gary continued the ground search. Noel returned with the second video. Noel and I reviewed and confirmed the possible crash site shown on the second video.
Noel then set off on the third fly over while I contacted Gary by walkie talkie to look skyward to spot Noel's search plane over head. Noel then flew directly over the possible crash site leading Gary to it. |
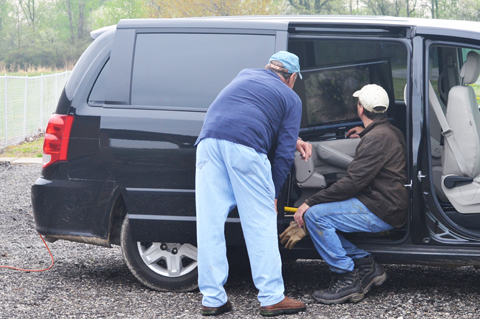
Gary then immediately spotted and retrieved the crashed plane and was able to follow Noel's search plane leading him directly out of the wood onto the flying field with the rescued plane in hand.
I would like to thank all you guys for your concern and help, especially Gary, Noel, and Karl. In time and after making a new main wing assembly, a new horizontal stab & elevator, and some rework here and there, the prototype "Stick 2 It" will be resurrected and will fly again.
Rattlesnake |
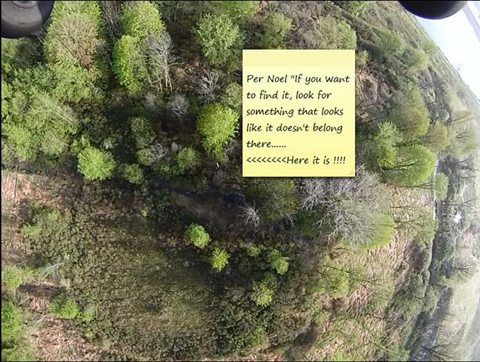
Click the picture to watch the fly over that located the Stick 2 It.
(14 second video) |
 |
|
 |
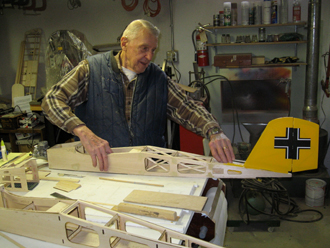
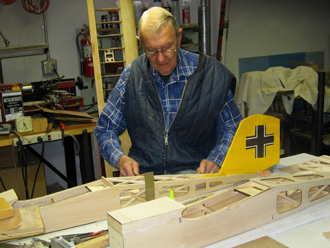
5/4/15:
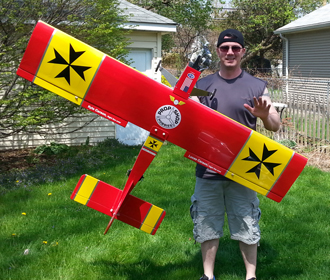
This is a photo of Herb's German rendition of the "Stick 2 It", that he built for his step son, Kenny (shown holding the plane).
From Herb,
Here is the final results of the project. It will likely go out to the field on Thursday morning for it's maiden flight with it's new Student Pilot, Kenny...assuming the weather forecast holds, that is. We fired it up yesterday. Runs great!
Thanks again for all your contributions and support to this project (the club's as well as my special project for Ken). |
 |
|
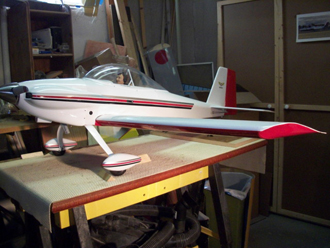
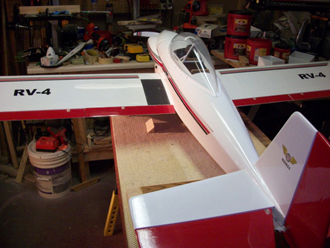
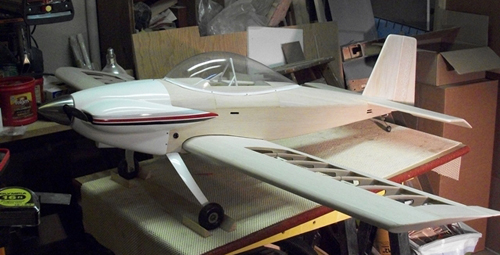
4/4/15:
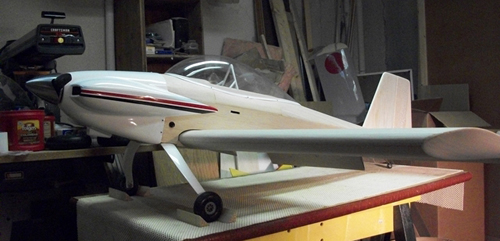
From Gordon: "The Stick2it/RV4 conversion is done. Ready for Mini-Toledo. Weight came out just over 9 lbs"
 |
 |
This from a Stick? The bar (for kit bashing) has been raised - - significantly! Way to go Gordon. |
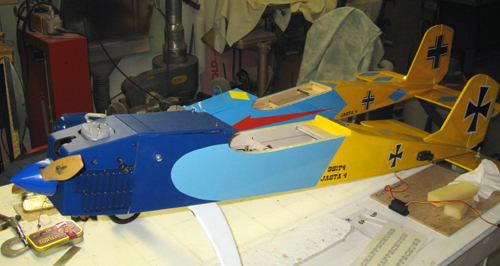
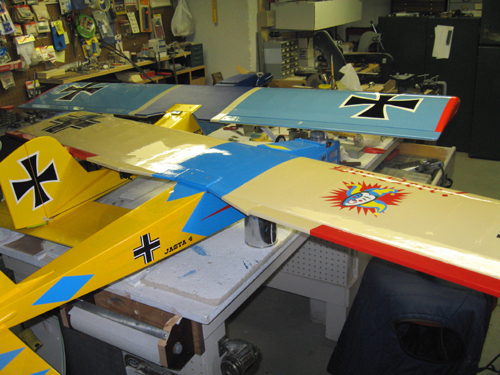
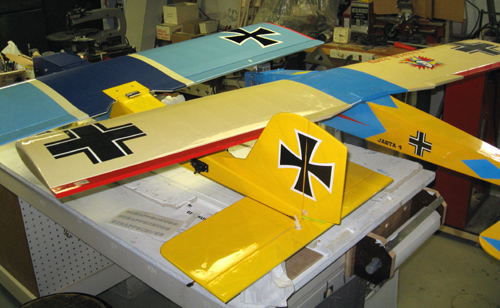
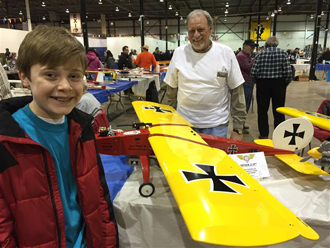
3/29/15:
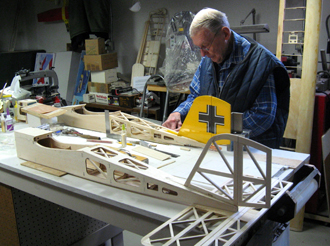
A progress photo of the "Stick 2 It" (German version) built by Pete M..........Rattlesnake & Grandson Alex M...........Zander, taken at the Gibraltar Model Aircraft Show.
|
|
 |
3/6/15:
Keith decided to Build his Stick2It as a low wing, so it is called Stick-Up.
|
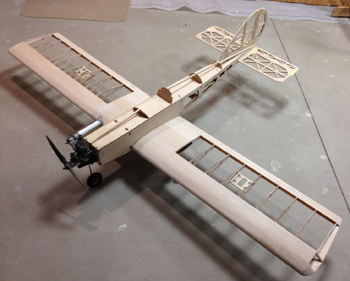
3/11/15:
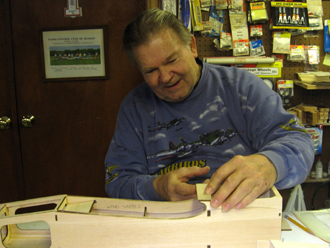
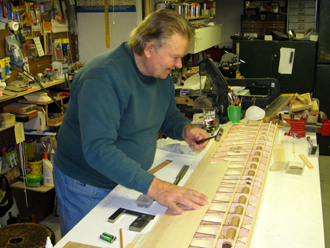
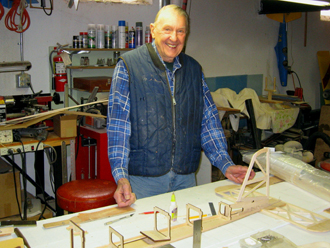
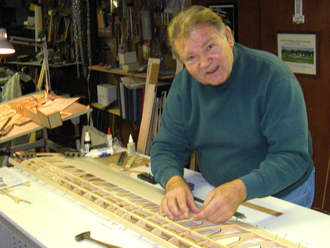
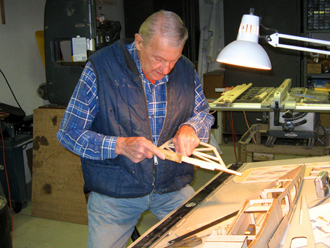
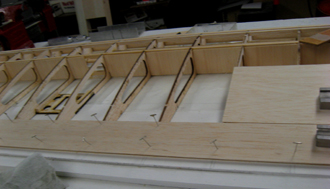
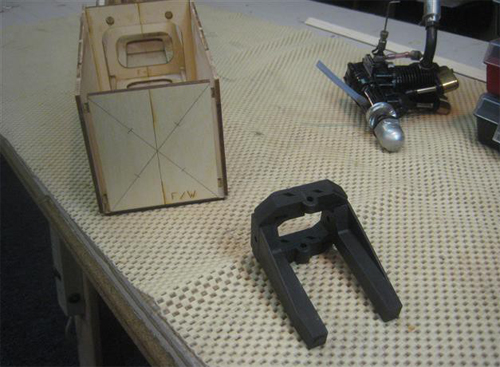
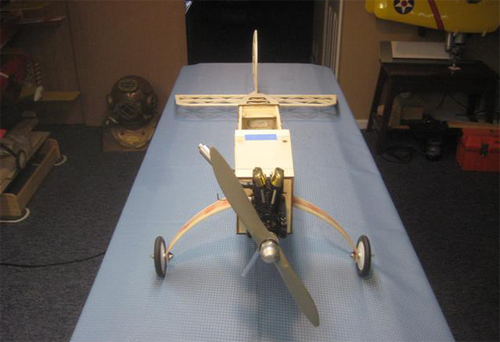
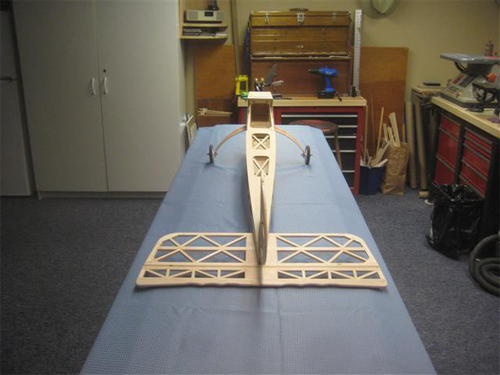
George and Joe enjoying working on theirs together
|
|
2/26/15:
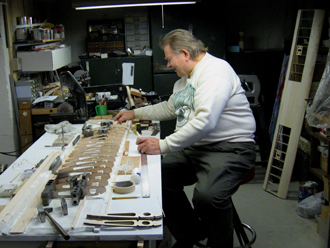
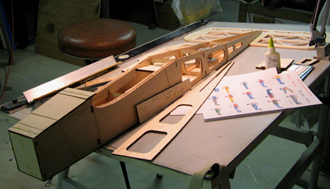
Joe Svatora and George Dudek receiving their kits and began the building this week in Joe's workshop. (Actually sent on 1/22/15, but we had some difficulty posting the pictures)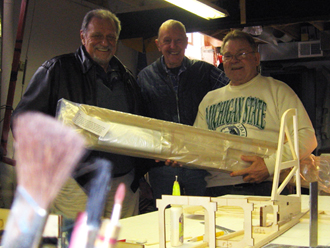
|
|


|
 (Mobile).JPG)
A simple balsa/lite ply cowl was added: The tail wheel assembly was fabricated and installed:
 (Mobile).JPG)
The wing tips were designed and installed:
 (Mobile).JPG)
 (Mobile).JPG)
The throttle, elevator, and rudder servos along with their push rods were installed
 (Mobile).JPG)
 (Mobile).JPG)
 (Mobile).JPG)
Satisfied with the controls, their movements and clearances, the plane is again stripped for final sanding, painting, covering and trim
 (Mobile).JPG)
 (Mobile).JPG)
 (Mobile).JPG)
|
 (Mobile).JPG)
 (Mobile).JPG)
The WWI German style ailerons were constructed and installed
 (Mobile).JPG)
 (Mobile).JPG)
 (Mobile).JPG)
The servo wire extension in each half of the wing were run through the main wing by first "sucking" strings through the paper tubes within the wing and out through the holes in the bottom sheeting by using a vacuum cleaner. The servo wire extensions were then attached to the strings and the servo wire extensions were pulled out through the holes in the bottom sheeting by pulling on the strings. Both aileron servos, control horns and push rods were installed and connected. The ailerons were aligned to the bottom of the wing using the supplied angle template or gauge
 (Mobile).JPG)
 (Mobile).JPG)
 (Mobile).JPG)
 (Mobile).JPG)
 (Mobile).JPG)
|
2/17/15:
From Rattlesnake Pete:
There were additional changes added to the design and build of my WWI German rendition of my "Stick 2 It" since my 1-11-15 progress report.
 (Mobile).JPG)
 (Mobile).JPG)
The Main wing was final fit to the fuselage wing saddle, aligned and then attached to the fuselage
 (Mobile).JPG)
 (Mobile).JPG)
My grandson Alex...........Zander spent most of his day off from school working on the plane with me. The fuel tank & fuel lines were set up and installed
 (Mobile).JPG)
 (Mobile).JPG)
All the components were reassembled for the initial testing of the movements of all the flying surfaces, clearances or interferences and for any push rod binding
 (Mobile).JPG)
 (Mobile).JPG)
 (Mobile).JPG)
Mid-Winter break from school for Alex........... time to work on the plane.
The plane is complete and balanced at this point. Waiting for warmer weather to test run and tune the engine.
Pete M..........."Rattlesnake" --- & --- Alex M.........."Zander |
|
02/03/15
An update from Gordon:
"Hey guys!
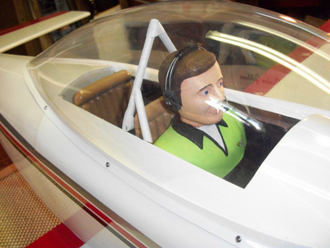
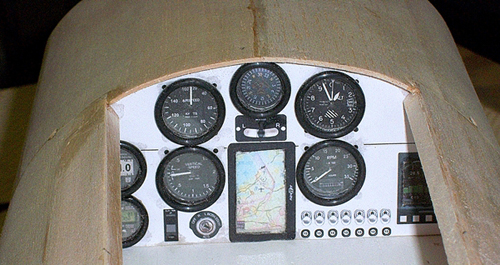
Thought I'd send an update before I cover it. Still missing the pilot figure. My son is painting that and he's taking his time. Also missing the wheel pants. I haven't started on those yet. Weight looks to be pretty close to 8 1/2 lbs.with the O.S. .91 4-stroke hidden inside the cowl. The CG is close enough to tweak with the battery placement which I haven't finalized yet.
-Gordon "
How about that instument panel!
|
|
|
01/11/15
Pete M.........Rattlesnake's "Stick 2 It" Progress report
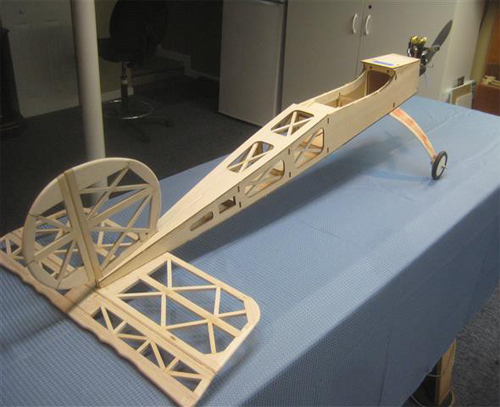
The WWI German version of my "Stick 2 It" has been started and progressed with the help of my grandson Alex M...........Zandor. Alex is a youth member of AMA and a junior member of RCCD. His help is limited due to his school schedule and his school activities. I will just have to struggle along when he is not helping.
The original design of the short kit's tail feathers and ailerons have been revised to look like a generic WWI German aircraft.
I thought I would try installing a Saito 56 four stroke.
|
The rest of the original design has been used to build the plane as of this progress report. More changes to follow.

|
|
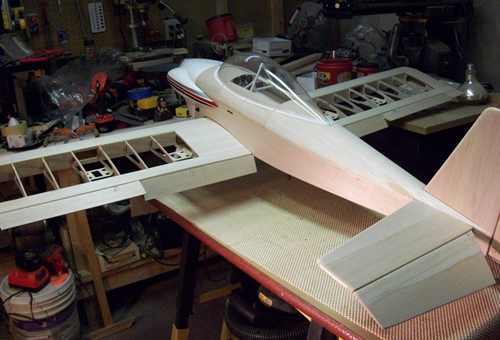
01/02/15
Hey guys!
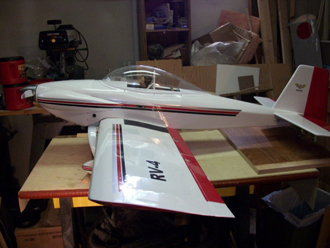
I saw an RV-4 hiding inside (or outside) the Stick2It project. So I bought the Canopy and Cowl for the discontinued Great Planes RV-4 .60 ARF. I wanted to use as much of the kit as possible, so it is still the club project.
The wingspan is 69".Length tip to tail is 61". Fuselage width is 7". The real RV-4 has a wingspan of 23' and a length of 20' 4". width of the fuselage at the pilot seat is 28" So this is 1/4 scale. That is my goal.
I flipped the fuse to give me a low wing. I adjusted the wing saddle to fit. I split the fuselage formers and widened them to 7" (appropriately tapered to the rear). I added 3" to the tail and added some to the bottom of the fuse so the rake is not as severe as the Ugly Stick and matches the shape of the real RV-4 profile.
I used the kit sticks to build up the tailfeathers, but redesigned to look like the RV-4.
I used the kit wing parts pretty much as is, just stretched to 69" and converted the last rib bay into the distinctive RV-4 tip shape. I built the wing in 2 pieces so I could add some dihedral like the real thing. Yes, it has functional flaps.
|
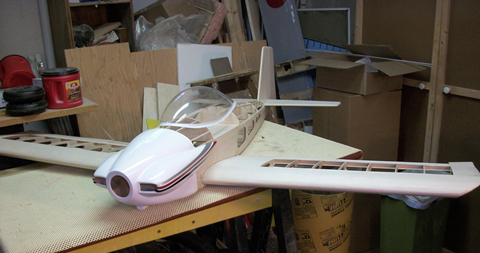
There's a lot of work left to do, but it is starting to look like something.
Gordon |
|
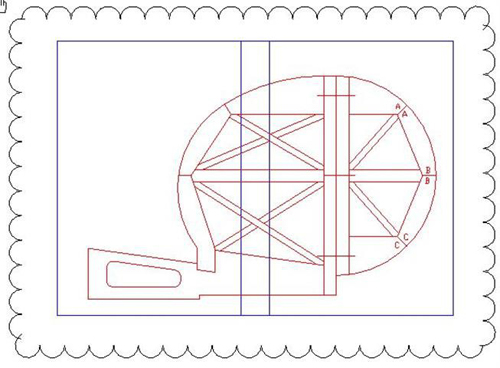
01/01/15
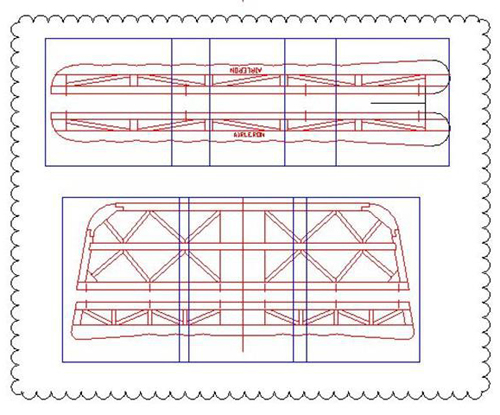
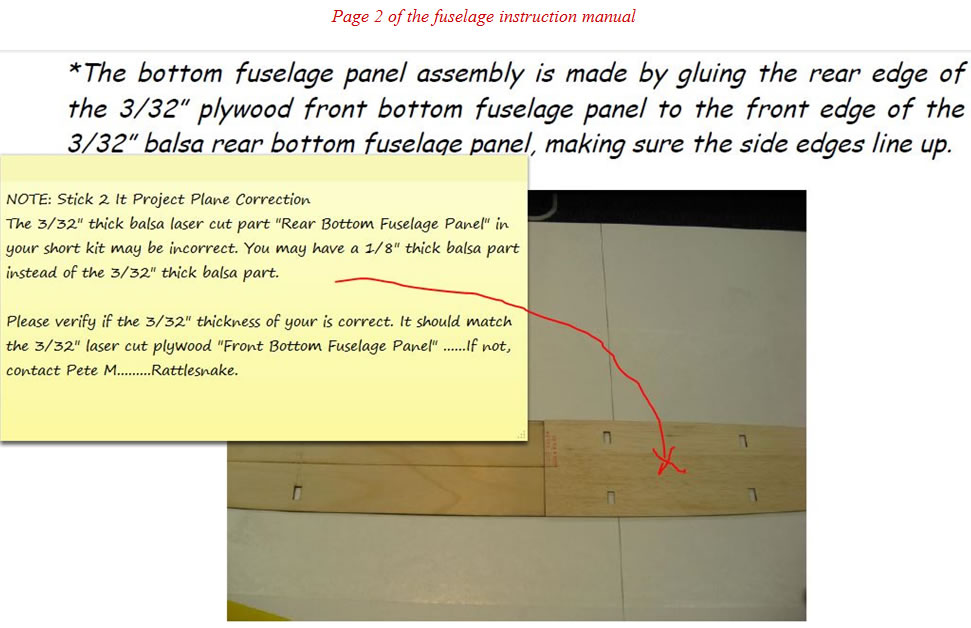
Please note: There are three short kits that have an incorrect laser cut balsa wood fuselage part. Your short kit may be one of them. The incorrect part is the 3/32" thick balsa wood "Rear Bottom Fuselage Panel". This incorrect part was made from a 1/8" thick balsa sheet instead of a 3/32" balsa sheet. To verify the thickness of your part, it should match the adjacent 3/32" thick plywood "Front Bottom Fuselage Panel". If your part is not 3/32" thick, please notify Pete M. either by phone (586) 463-2249 or reply by email. please see the picture (made from the instruction manual) and the attached "sticky"note below. Sorry for the inconvenience,
Pete M..........Rattlesnake
12/23/14
News from the Quad Squad on their build. Rattlesnake submitted this write up on how the club project planes all got started and what the Quad Squad are doing this time.
Be sure to submit pictures and progress reports of your Stick 2 It build and I'll post them here. E-mail to webmaster@rccd.org |
|